Guide 1
Use Gleanbox
Gleanbox turns something you encountered into a focused knowledge entry, then brings it back when you need to recall it.
Your raw collection is temporary working material. The processed knowledge entry is the durable source of truth used by search, decks, practice, export, and Git sync.
Capture the moment before it disappears
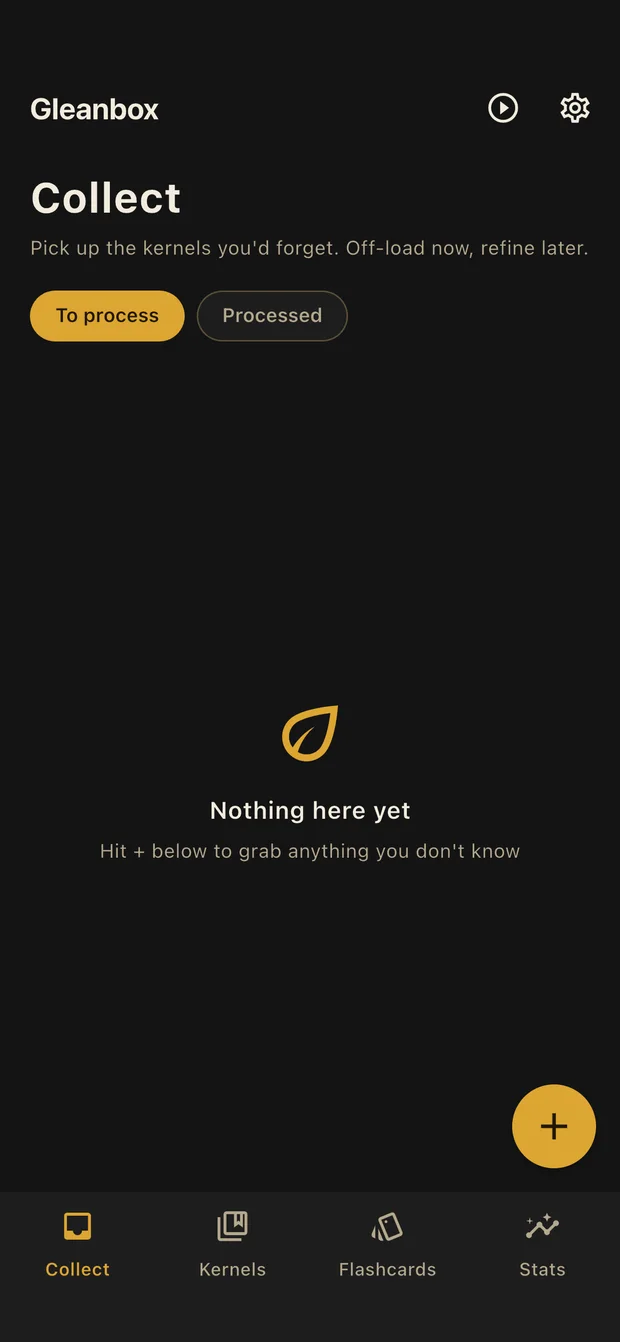
Open Collect and tap +. Save text, take a photo, choose an image or file, record audio, or capture a short video. Start quickly; you can remove the irrelevant parts later.
- Choose the lightest useful format. Text is fastest, a photo preserves visual context, and audio or video is useful when timing or pronunciation matters.
- Do not organize yet. The collection is an inbox, not your permanent library.
- Process it when you have time. Items remain under To process until you finish them.

Process only the useful part
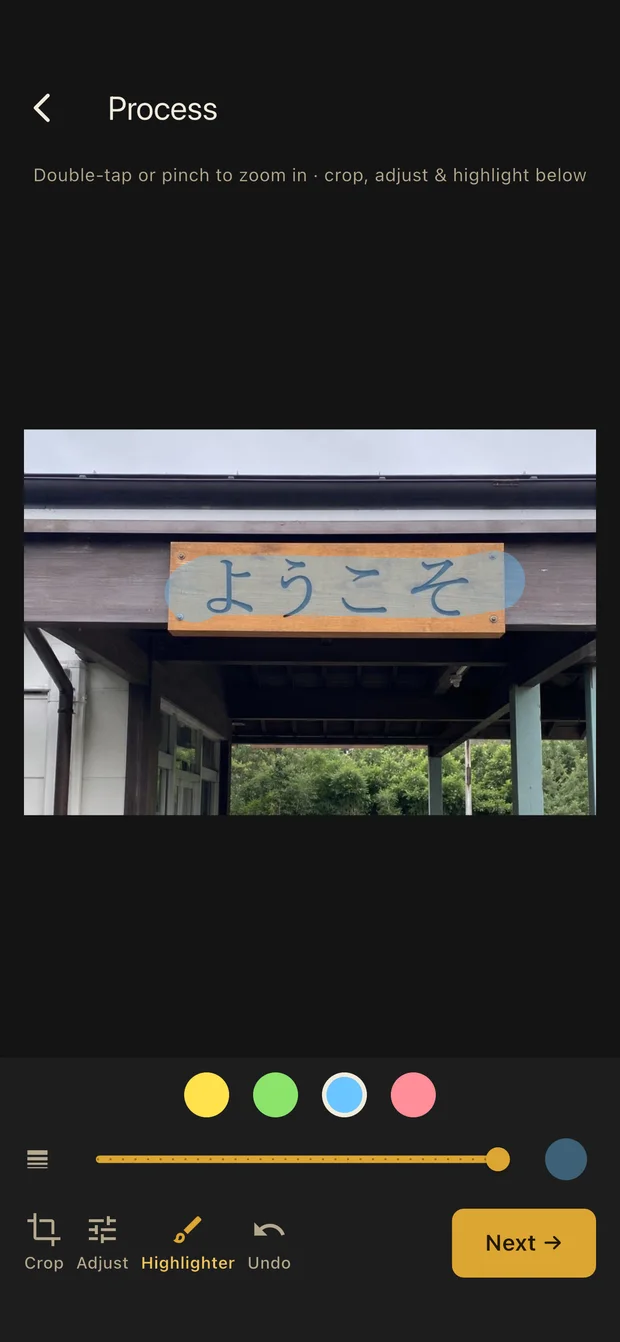
Open an item and choose Process. This stage removes noise and turns the encounter into a compact knowledge entry.
- Focus the media. Crop, rotate, adjust brightness and contrast, or highlight the important area. Trim audio and video; processed video is limited and compressed before entering the durable library.
- Name the target. Enter the word, phrase, sentence, or concept you want to remember.
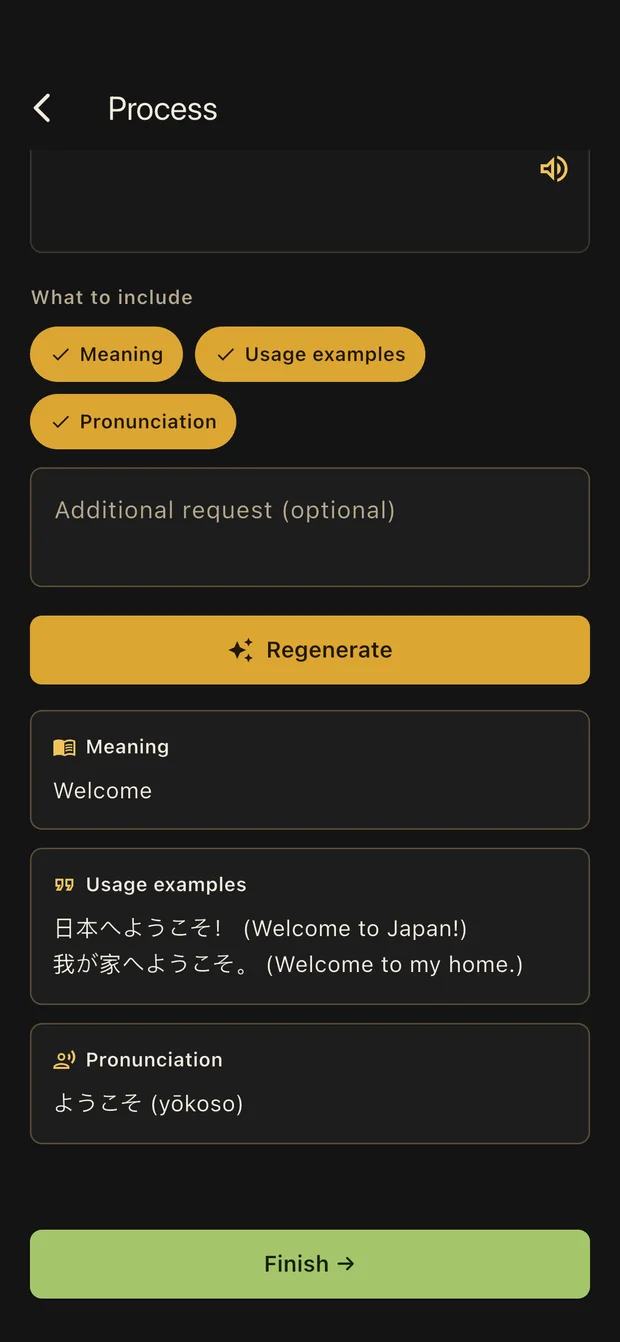
- Choose how to explain it. The equal-width tabs offer AI explanation and Manual notes. Manual notes work without an API key. In AI mode, choose Meaning, Examples, and Pronunciation, and add a request when you need a specific focus.
- Review on a clean preview page. Check the focused media, target, explanation, and your editable notes before saving. The result becomes a knowledge entry. The original capture stays local so you can reprocess it, and can be cleared later when no longer needed.
Organize without building silos
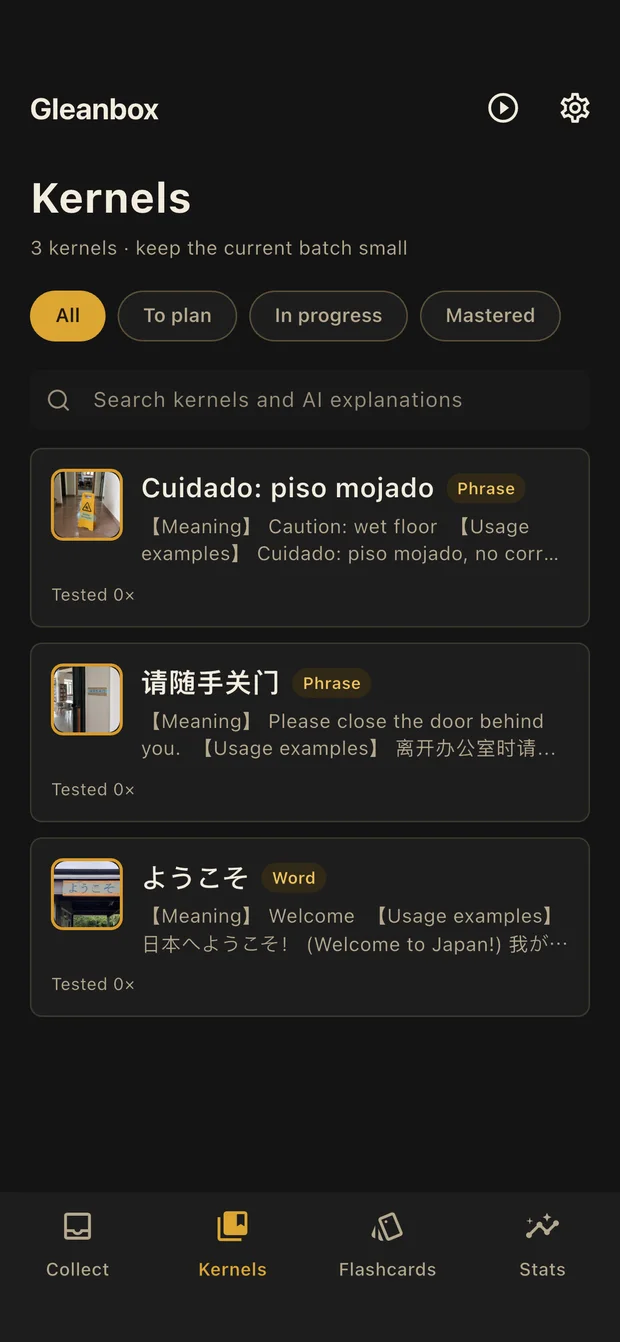
Processed entries appear in Kernels. Search the entry text and explanation, add your own notes, or place entries into decks.
- To plan: the entry is not in a deck yet.
- In progress: the entry belongs to at least one deck.
- Mastered: you marked the entry as mastered.
- Decks are scopes, not containers: one entry can belong to several decks, and removing it from a deck never deletes the entry itself.
Choose planned review or free practice
Open a deck, then tap Start. The practice page offers two modes:
- Planned review
- Follows FSRS. Recall first, reveal the answer, then rate your memory. The next due time adapts to your result.
- Free practice
- Shuffles every entry in the deck for one round. It records a simple count and does not change FSRS scheduling.
Enable local notifications if you want due-review reminders. A planned practice run completes when every included entry has been marked mastered; closing a run manually is permanent.
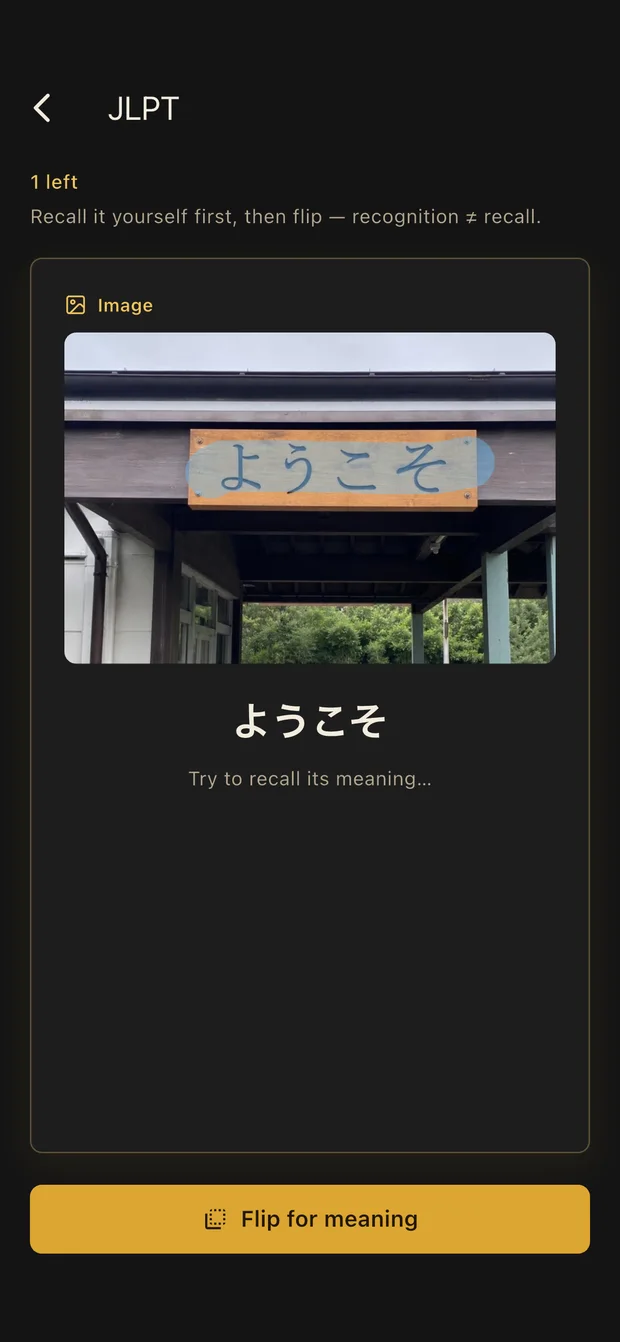
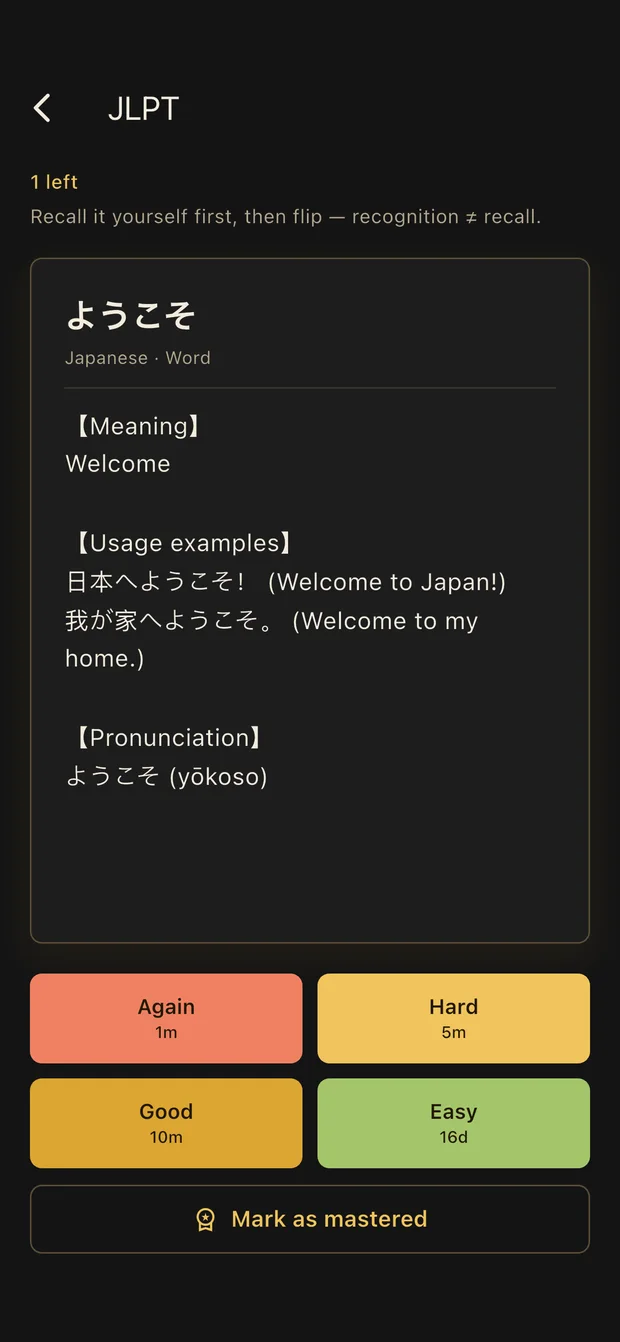
Keep the active batch small. Process a few new items, practise what is due, and add more only when the current set feels manageable.
Guide 2
Get a free Gemini API key
AI is optional. Quick mode connects Gleanbox directly to Google Gemini with your own key; Nixlight does not proxy the request.
Google controls supported regions, models, quotas, and billing requirements. Check the current status in AI Studio. Never send your API key in a screenshot or support message.
Create the key in Google AI Studio
- Open Google AI Studio · API keys and sign in with your Google account.
- Accept the Gemini API terms when prompted.
- Select Create API key. New users may receive a default Google Cloud project automatically; otherwise choose or create a project you control.
- Copy the new key and keep it private. You only need to paste it into Gleanbox once.
Reference: Google's API key documentation.
Connect the key to Gleanbox
- Open Settings → AI Settings.
- Choose Quick. The Gemini provider, endpoint, and model preset are already filled in.
- Paste the key into API key, tap Test, then tap Save.
- Back in Settings, choose AI output language. It can follow the interface or use a different language.
Advanced mode is for an OpenAI-compatible endpoint. It can also use one model for image recognition and another for the final explanation. Start with Quick mode unless you already operate another API.
Fix common connection errors
| Message | What to check |
|---|---|
| Invalid API key / 401 | Copy the full key again, remove spaces, and confirm it has not been deleted or restricted incorrectly. |
| Forbidden / 403 | Check region availability, project access, accepted terms, and whether the Gemini API is available to the account. |
| Too many requests / 429 | The current quota is exhausted. Wait for it to reset or review usage and billing in AI Studio. |
| Model unavailable | Update Gleanbox first. In Advanced mode, verify the model name supported by your endpoint. |
Guide 3
Set up private Git sync
Premium syncs processed knowledge, decks, review history, and processed media to a private repository you own.
- The raw Collect inbox stays only on the device and does not enter Git.
- Your access token stays in secure local storage and is not committed.
- Use a dedicated private repository for each Gleanbox dataset.
- Git history is preserved so advanced users still have a recovery path.
Option A: prepare GitHub
- Create a new private repository, for example
gleanbox-data. An empty repository is simplest. - Open GitHub fine-grained personal access tokens.
- Choose your account as the resource owner, select Only select repositories, and choose only the Gleanbox repository.
- Under Repository permissions, grant Contents: Read and write. No Issues, Actions, Packages, or administration permission is needed.
- Generate the token and copy it now; GitHub will not show the complete token again.
Reference: GitHub personal access token documentation.
Option B: prepare GitLab
- Create a new private blank project, for example
gleanbox-data. - Open your GitLab avatar menu, then Edit profile → Access tokens.
- Create a token with the write_repository scope. This scope allows Git pull and push without granting the full API scope.
- Copy the token and store it securely.
Reference: GitLab access token scopes.
Connect the repository and make the first sync
- In Gleanbox, open Settings → Git sync.
- Paste the full HTTPS repository URL, such as
https://github.com/you/gleanbox-data.git. - Enter your GitHub or GitLab username and paste the personal access token.
- Tap Test connection. Resolve any permission error before continuing.
- Tap Save settings, then Sync now. After the first successful sync, edits are queued automatically and the selected interval performs a safety check.
A README-only repository can be adopted after confirmation. A repository containing unrelated data or another Gleanbox dataset is rejected; use a clean repository instead of forcing the histories together.
Restore on a new or reinstalled device
- Install Gleanbox and unlock Premium with Restore purchases if needed.
- Enter the same repository URL, username, and token in Git sync, then save the settings.
- Open Settings → Restore from remote Git.
- Tap Check Git settings. Gleanbox verifies access and validates the remote dataset before touching local data.
- When the check succeeds, tap Start restore and confirm. The device's learning data is replaced by the remote copy, then the local search index is rebuilt.
Use it on a new device or only when you intentionally want the remote repository to become the complete local dataset. The remote repository and its Git history are not erased.
Git troubleshooting
| Problem | Action |
|---|---|
| 403 / authentication rejected | Use the complete HTTPS URL and verify repository access plus Contents read/write on GitHub or write_repository on GitLab. |
| Different dataset | Do not merge it. Use another empty repository for local data, or use Restore from remote Git if the remote data is the one you want. |
| No common ancestor | The histories cannot be merged safely. Restore the intended remote dataset or connect local data to a new clean repository. |
| Sync appears idle | Open Git sync, check Recent activity, then use Sync now. Automatic sync normally runs silently unless an error needs attention. |
Guide 4
Delete your data
Gleanbox is local-first, but one piece of learning data can exist on your device, in a Git repository, and in a request sent to an AI provider. Delete each copy separately.
Clearing the device does not delete Git history or data previously handled by Gemini. Deleting the Git repository does not clear the device. Review all three locations below.
Delete data stored on this device
Delete individual items
- In Collect or Kernels, long-press an item, select any other items, then choose Delete.
- Deleting a deck removes only the deck and its membership links. It does not delete the knowledge entries that were in it.
- If Git sync is active, deleting a processed knowledge entry is synchronized to the current remote snapshot, but older versions can remain in Git history.
Erase all Gleanbox data from the device
- Open Settings and scroll to Danger zone.
- Open Clear all local data.
- Read the list carefully, select the acknowledgement checkbox, then tap Erase everything.
This removes local entries, raw Collect material, decks, review history, processed media, settings, reminders, AI keys, and Git credentials. It does not contact or modify the remote Git repository.
Export or complete a Git sync first if you may need the data later. Your operating-system or device backup may retain an older app copy until you manage that backup separately.
Delete synchronized Git data
Clear Git settings only removes the repository address and credential from this device. It does not delete the remote repository, local learning data, or existing Git history.
For a dedicated Gleanbox repository, deleting the whole repository is the clearest way to remove the current files and their Git history:
- In Gleanbox, open Settings → Git sync and use Clear Git settings so the app stops trying to access that repository.
- On GitHub, open the repository, then Settings → General → Danger Zone → Delete this repository. Follow GitHub's confirmation steps.
- On GitLab, open the project and choose Actions → Delete. GitLab may first place the project in a pending-deletion period; follow the host's controls if you need immediate permanent deletion.
- Revoke the personal access token if it was created only for Gleanbox.
Official references: delete a GitHub repository and delete a GitLab project.
A normal commit that removes files leaves earlier versions in Git history. If the repository exists only for Gleanbox and complete removal matters, delete the dedicated repository rather than only deleting its current files.
Understand data sent to Gemini
When you request an AI explanation, Gleanbox sends the prompt and the text or media needed for that request directly from your device to Gemini. Nixlight does not proxy or keep a server-side copy of that AI request.
- The generated explanation saved in a knowledge entry is local Gleanbox data. Clear the device to remove the local copy; also remove the Git repository if that entry was synchronized.
- Clearing Gleanbox data does not send a deletion request to Google and cannot erase content already processed or retained under Google's policies.
- With Gemini API unpaid quota, Google's current terms generally allow submitted content and generated responses to be used to provide, improve, and develop its products, and human reviewers may process inputs and outputs. Do not submit sensitive, confidential, or personal information. Regional exceptions apply, so check the current terms for your location.
- For Gemini API projects with active Cloud Billing, Google states that prompts and responses are not used to improve its products, although limited safety, abuse-prevention, operational, and legal retention can still apply.
To stop future requests, clear the API key field in Settings → AI Settings and save, then delete or restrict the key in Google AI Studio or Google Cloud. Revoking a key prevents future use but does not necessarily delete content submitted earlier.
Review the current Gemini API Additional Terms, Gemini data-retention documentation, and Google Privacy Policy before sending private material.
Checklist for complete removal
- Clear all local data on every device where Gleanbox was used.
- Delete exports saved in Files, Downloads, cloud drives, or other backup locations.
- Delete the dedicated GitHub or GitLab repository and revoke its access token.
- Delete or restrict the Gemini API key. Consult Google's policies for requests previously submitted to Gemini.
- Manage device or operating-system backups separately if they may contain an older app copy.